A "World" is a folder on your computer or network.
You might call it a project or something else, but it is basically where everything in your world lives.
You create a folder, give it a name, and that becomes your nominated world.
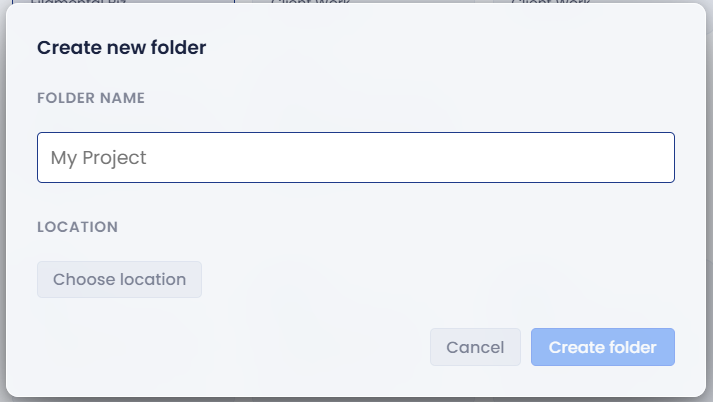
All your node text (like this page) lives in that folder as plain markdown files (you can rename the label in Filamental without touching the folder name itself). Filamental is essentially a super-clever file explorer with bells on, which is why your work is always yours and readable by (almost) any app.
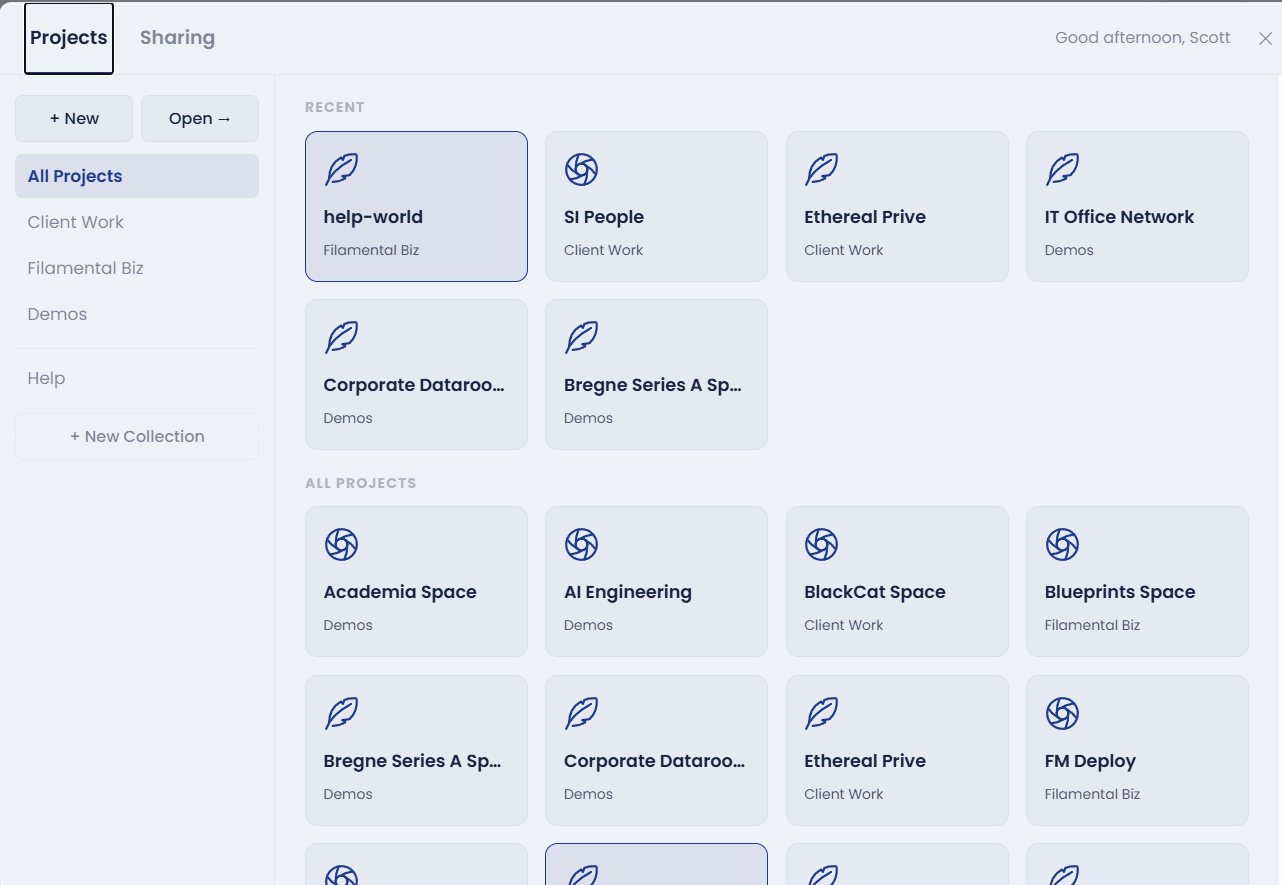
Your saved projects, browsed from the Projects window (top left), are essentially bookmarks to these folders, editing the name or forgetting one doesn't touch the actual files, it's just a shortcut (more in Forget, Remove or Delete a Project). If you move the world folder on disk, just relocate it via "fix" from the same window. A hidden .filamental folder inside it saves settings and other bits & bobs. Every way to start a project is covered in New, Open or Import.
Controls for moving around this canvas are covered in Graph Navigation and the full key/mouse map in Shortcuts.
Bottom Panel

This is where you do things in the graph/canvas: insert nodes, connect them, change types, switch views, and trigger exports (see Graph Navigation). Most buttons here are covered in more detail under their own heading below.
Left Buttons
- Dark energy (alien): auto-arrange according to physics
- Layer: auto-arrange according to classification order
- Grid: show/hide
- Settings (atom): adjust physics
- Spin (UFO): a quick 360 spin around
Middle Buttons
- Plus: add images, links, files, bridge nodes (all as independent nodes)
- Node type: changes type
- Connector: changes properties
- Connect: brings up connector menu
- Pathfinder: lights the shortest route between two nodes (key R, see Pathfinder)
Right Buttons
- Screenshot: full frame image
- Export for AI: saves your whole world as a Markdown file with a Structure section at the top, ready to attach to an AI chat (see Export for AI)
***
2D vs 3D

2D, sometimes called "focus mode." Click 2D, then Dark Energy, to spread everything out flat. Good as a working surface.
3D, for when you want to consolidate and see the shape of your business or project. Powerful for understanding and visualisation, and it's also the clearest visual representation of how AI understands your knowledge.
We tend to alternate: 2D for working, 3D for understanding.
Web vs Layers
There are 4 variables you can combine: 2D/3D and Dark Energy/Layers, mapped to keys 1, 2, 3, 4.
Web (Dark Energy) is the default free-form view: nodes repel each other and settle into a natural web shape.
Layers is a different way to see the same system. It stacks nodes according to their classification hierarchy (set in Left Panel). Click it multiple times to cycle through layouts that suit you. By default, unclassified nodes sit at the top ready for you to allocate. The order of your classifications determines the layers' stacking order.
Both work in 2D or 3D.
Try combining these live, the buttons are in the top and bottom bar.
Importing & Linking
Insert menu (bottom bar, + button) is the entry point for bringing things in:
- Files/docs: insert any file type as its own node. You can choose to move it into your World Folder or copy it there. Clicking the node launches it in its usual associated program. You can also just drop a file straight into the folder itself and it appears as a node automatically.
- Weblinks: copy a URL, Insert > Insert Link, paste, give it a short title. Done.
- Mermaid diagrams: if you've had an AI turn a conversation into Mermaid code (or generated one from scratch), paste it here to build a whole structure in one step. See AI Connections & Prompting for the actual prompts, that's the canonical home for anything mermaid/AI-generation related.
- Document and Folder Exploration: an AI reads one document, or a whole folder, and adds what it finds as a separate structure. See Explore a Folder or Document with AI.
- Classify notes by folder: gives notes that have no classification the classification of the folder they sit in. See New, Open or Import.
- Bridge to another project: creates a node that jumps you into a different project with a double-click. Free on every plan, and it's also the way round the free tier's 20-node cap, hit the limit on one project and bridge into a new one to keep going without losing or deleting anything. See Account & Billing for the full picture on limits.
Going the other way, the broadcast icon in this same bottom bar saves your whole world as a file in a format AI understands, so you can attach it straight to a conversation. See Export for AI.
Basic Connecting
Connect nodes using the connect button (bottom bar) or by holding ALT and clicking/dragging onto a target node.
This just makes the link. Two things people often go looking for elsewhere:
- Connector formatting (label, colour, arrowheads, changing type) lives in Left Panel.
- Connector attraction/strength (how hard Dark Energy pulls along that connector) lives in Right Panel (Notepad).
Creating & Changing Nodes
Nodes have unique identity numbers and sit in your master folder as simple markdown files (or other file types entirely, see Importing above). You can move them between folders on disk however you like and they'll stay connected, since the connections travel with the files rather than with their location.
- Change a node's type/classification: do this from the node itself, and it's reflected live in the left panel. A lot of functions are deliberately duplicated across the UI for convenience, you'll find more than one way to do most things.
- Node scaling: nodes visually grow from 100% to 200% size the more connections they have, if you have this turned on.
Node Labels on the Canvas
Filamental displays node titles in full on graph cards, no truncation. If your graph feels visually dense:
- Connector Length (Forces popover, atom icon): increase to push everything further apart.
- Zoom out: text scales down and the structure reads as shape.
- Shorten the title: detailed content belongs in the node's notes, not the name.
- Layers view (key 4): structured hierarchy instead of free-form web, easier to read at density.
Physics & Layout (bottom bar)
Not to be confused with the Projects window (top left), which is about switching between whole projects. These controls govern what happens inside your current graph/canvas, and live in the bottom bar rather than a settings menu since they're live adjustments you want to watch happen.
- Dark Energy: the physics engine of the graph. In astrophysics, dark energy is the mysterious force that accelerates the universe's expansion; here it repels all nodes from each other and works against your connectors. You can manually arrange nodes, but you'll increasingly lean on Dark Energy to do it for you. It doesn't always nail it first try, click it repeatedly until you find a layout you like, or multi-select a section (CTRL+drag) to rearrange just that part without disturbing the rest. Highlight something in the left panel first and Dark Energy lays that out first and arranges the rest around it, see Highlighting and Focused Layout.
- Forces popover (atom icon, next to Grid): every slider drags live, you'll see the graph re-spread as you move it. Hover over any of them for a description.
- Structure Separation: the distance between structures that share no connections. Good for balancing multiple structures or keeping tabs on stray nodes you haven't hooked up yet.
- Connector Length: the base length of every connector, which sets how big the whole graph is.
- Hub Reach: pushes the neighbours of a busy node further out, so it stops crowding everything around it.
- Branch Weight: connectors reach further when more sits behind them, and pull in close to a dead end.
- Settling: how far nodes may travel after the spread to bring linked branches together. At zero the layout keeps a strict branching shape.
- Branch Angle: how wide branches fan out from the same node.
- Branch Grouping: how strongly a node's branches gather by classification, see Highlighting and Focused Layout.
- Minimum Gap: the closest two cards are allowed to sit, which only acts on cards that would otherwise overlap.
- Grid: anchors the up/down of the graph, it's your visual "floor." Press G to toggle. Useful to leave on while building since it gives you a reference point without being prescriptive.
- Backgrounds: covered under Top Bar, not here.
- Performance Mode: the last resort, set in Account & Billing (Settings > General > Advanced). If your machine is struggling, this saves the app and gives you time to exit on your own terms. If you've hit this point, it's a sign your structure has probably gotten too big, consider breaking it up into folders, or asking an AI to do that for you (see AI Connections & Prompting).
